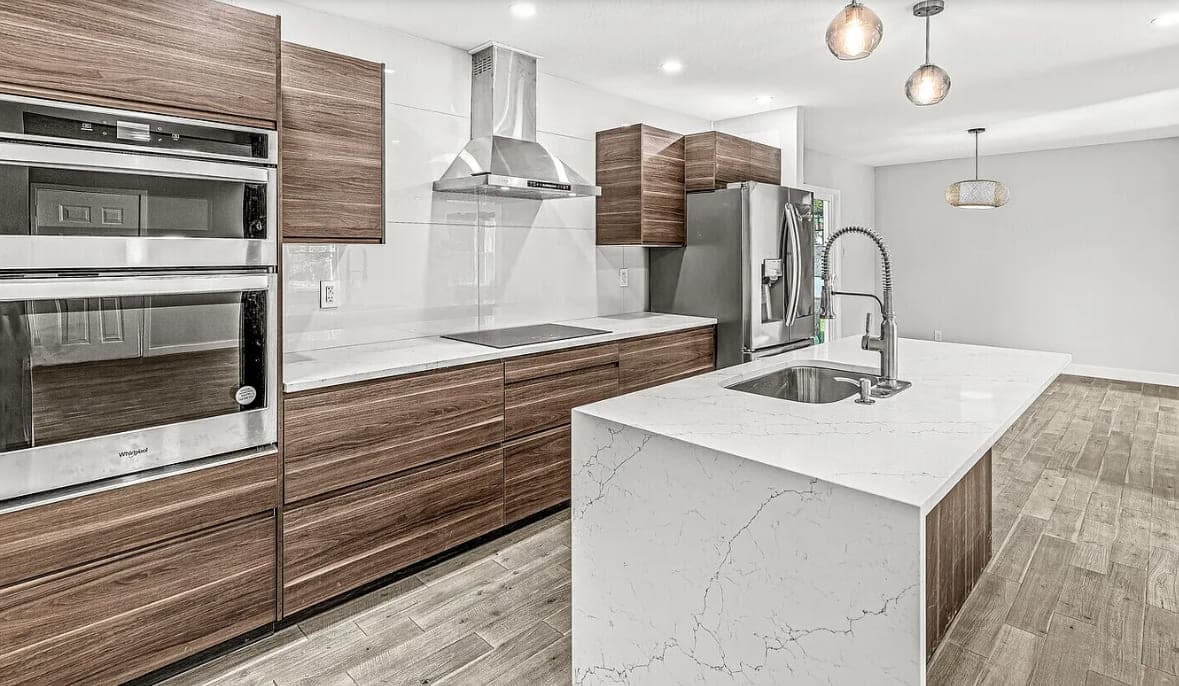
Stand at your own counter, mid-chop, and look at the board. In most kitchens the brightest surface in the room is the floor behind you, and the darkest is the piece of counter you are working on. You are standing between the ceiling and your hands, and the wall cabinet overhead throws a second shadow on the first. The room is not dim. The light is arriving from the one direction that leaves you working in your own shade.
More cans do not fix that. They give you a brighter room with the same shadow in it. What fixes it is light from somewhere other than the middle of the ceiling, on a switch of its own — and most of that is a wiring decision, made with the studs open.
Why a kitchen fights its own lighting
Most rooms have one plane you care about. A kitchen has half a dozen, and none of them is the floor: the counter runs, the sink, the cooktop, the island, the inside of the pantry. Each is somewhere you need to see something specific — a knife edge, a simmer, a label, the color of a piece of chicken.
Then the room puts obstructions between the ceiling and all of them. Wall cabinets project over the counter. A hood hangs over the range. A soffit may run above the cabinets with ductwork or a drain inside it, which is also why the ceiling cannot always take a fixture where the plan wants one. The most to see, the most in the way.
The three layers, and what each one does here
The vocabulary is the same as in a bathroom — ambient, task, accent — but the jobs are different, and in a kitchen all three have real work.
Ambient
Ambient is the general level. Enough to walk in, set the bags down, find the room. Cans on a grid, a flush mount, light bounced off a ceiling. It is the layer that gets over-bought, because more cans is the easiest thing to draw, and it lights horizontal surfaces from above. That is the whole of its skill set and the whole of its limitation. It will make the floor and the top of the island look excellent and do almost nothing for the counter under a wall cabinet.
Task
Task light is aimed at a working plane from a position that can reach it: under the wall cabinets, over the sink, at the cooktop, inside the pantry, and above any run of counter with nothing over it — a run with no upper cabinet gets its task light from the ceiling or not at all.
This is the layer that changes how the room works rather than how it looks, and it is cheap while the walls are open and a nuisance afterwards.
Accent
Accent has no functional job, so it is the first line struck when a quote has to come down. Light inside a glass-front cabinet. A strip above the cabinets where there is a gap to the ceiling. A toe-kick wash. It is most of what you notice in a photograph of a finished kitchen without being able to name what you are noticing.
It also does one practical thing. A low accent source on a dimmer makes the kitchen usable at night without the ceiling coming on and waking the house. That argument survives a budget meeting. "It looks nice" does not.
Under-cabinet light, and where the strip actually goes
If you do one thing on this list, do this one. Under-cabinet light puts a source below the obstruction and in front of your body, which is the only geometry that lights the counter you are standing at.
Front of the cabinet, not the back
Mounted at the front edge of the cabinet bottom — behind the face frame, or behind a light rail added for the purpose — the light throws out and down across the counter and lands on the work. Mounted at the back, tight to the wall, it lights the backsplash beautifully and leaves the front half of the counter, the half you use, in shadow. That is the most common installation mistake we find, and it is rarely a decision: it is a strip stuck wherever it fit around the cabinet's bottom panel.
What raking light exposes
A source close to the wall throws light almost parallel to the tile. That is the hardest test a backsplash ever gets: lippage between tiles, a grout joint that wanders, a wall that was never flat. Worth knowing before you choose a large-format or handmade tile for the wall behind the counter, and before you choose a high-gloss door, because the same grazing light reads every ripple in a painted finish.
Reflection cuts the other way. Bare LED tape is a row of dots, and every dot reproduces in a polished quartz top and again in gloss tile. Tape in an aluminum channel behind a frosted lens reads as a line instead. Pucks scallop — bright pool, dark gap, bright pool — a mistake on a long run and fine over a short one.
The driver, and how you reach it
Low-voltage strips run off a driver. It is a component, it gets warm, and it does not last forever. It has to sit somewhere ventilated and somewhere a person can reach: inside a cabinet, above the wall cabinets, in the toe kick. Buried behind a fixed panel, replacing it becomes carpentry. Ask where the driver goes and what has to come off to get at it, and put both answers in the estimate.
The supply is the other half. During a remodel, cable to that run is a pull through open studs. After one, it is fishing a finished wall, patching and repainting. Same light, very different line.
The ceiling, and where the cans go
Lay the ceiling out to the cabinets, not to the room. A grid centered on the room's dimensions puts fixtures in the middle of aisles and over the tops of wall cabinets, lighting the doors and the floor. Set along the cabinet runs instead, far enough off the wall that the beam clears the cabinet face, the same fixtures land on the working edge of the counter instead.
A few positions earn a fixture of their own: over the sink, over the range if the hood light is decorative, and at the front of a tall cabinet run you want read as a wall rather than a dark block. Adjustable trims let you aim a fixture. A fixed downlight points at the floor forever.
What limits all of it is what is up there — joist direction, the soffit contents, the second-floor bath drain crossing where the plan wanted a light. A ceiling plan drawn before anything is open is a proposal, and in an older Hamilton County house it is a proposal with revisions in it.
Pendants over an island
Pendants are half decoration and half accent. They are not the island's task light — the ceiling still has to do that — which is how an island ends up with two glowing objects above it and a dim slab below.
Their number and spacing come from the island's finished length, and that length comes from the aisles around it, not the other way round. NKBA guidance is a clear work aisle of 42 inches for a one-cook kitchen and 48 inches where two people work in the same aisle or somebody passes behind one of them, measured with the doors open. Subtract those aisles from the room and what survives in the middle is the island you can have — only then does pendant spacing mean anything.
Height is a sight-line problem. Too high and a pendant is a ceiling fixture with a cord. Too low and it blocks the view across the island and puts a bare lamp at eye level for anyone on a stool — a glare source, not a light.
The boxes are the part with a deadline. They get set at rough-in, laid out from the island's final dimension and centerline, numbers that come off approved cabinet drawings rather than a sketch. If the island grows after that, the pendants are off-center for the life of the kitchen. Heavy fixtures want blocking between the joists, which is a framing decision and not something improvised with the fixture in one hand.
Switching, dimming, and color
Layers exist only if they are switched apart. Ceiling, under-cabinet, pendants and accent on one paddle is not three layers. It is one layer with a lot of fixtures in it.
A kitchen usually has two or three ways in, so each layer wants three-way or four-way switching, and then somebody has to count the loads: ceiling, under-cabinet, pendants, accent, disposal, sometimes the hood. Where that bank of switches lands is settled at rough-in. Moving a gang later means opening a finished wall — one of the ordinary ways a kitchen generates a change order.
Dimming goes wrong quietly. Most modern dimmers need a neutral at the switch, which an older switch loop may not have, and the dimmer has to be compatible with the driver it is dimming or you get flicker at the bottom of the range and a buzz you hear at night. Somebody has to read the compatibility list before the order goes in.
Color temperature is worth settling early. Mix a warm under-cabinet strip with a neutral ceiling and white cabinets read as two different whites, with the seam falling where your eye already is. Pick one temperature and hold every fixture to it — then accept that appliance lights, the hood included, arrive at whatever the manufacturer chose and cannot be changed. That is usually why the hood light is the odd one out.
When it has to be wired
Electrical rough-in happens after demolition and framing, before insulation and drywall. That window is when all of this stops being an opinion: box locations, switch legs, the cable feeding the under-cabinet run, a neutral at each dimmer, blocking for anything heavy. After drywall each one is a patch. After tile, it is tile.
Before rough-in, these want answers:
- Which layers exist, and which switch controls each.
- The cabinet layout, from approved drawings — the ceiling plan follows the cabinets, not the room.
- The under-cabinet type, and where its driver lives.
- The island's final size and the pendant centerlines.
- What is inside the soffit where a fixture is drawn.
- Which circuits dim, and whether the switch has a neutral.
Then walk it before the drywall goes on, standing where you will stand, and check the boxes are where you think — the pre-drywall walkthrough is the last cheap moment to move one.
On our kitchen remodeling page the electrical adjustments sit with the layout work rather than the finishes, and that is deliberate: lighting belongs to the stage where circuits move, not the stage where fixtures get hung. If the job also involves changing the work zones, the two plans get drawn together — a zone that moves takes its task light with it.
What it costs, roughly
We do not publish our own prices, for the reason we give everywhere else: a number written before anyone has seen your kitchen is a guess. What we can point at is what independent research says people in this market spend. Angi, Homeyou and Block Renovation's Indianapolis kitchen research put a kitchen here at roughly $18,000 to $24,000, with a full spread of about $8,000 to $40,000.
Lighting sits inside that as a modest material line and a larger labor one, and the split is the useful part. Fixtures are shopping, and shopping can be revisited — buy the pendants next year. Boxes, cable and switch legs are construction, and construction closes when the drywall goes up.
The short version
Ambient sets the level. Task lights the counter, the sink and the range. Accent is the layer that gets cut, and the one doing most of the work to make a kitchen read as considered rather than merely bright. A single overhead does the first job only, from the worst angle for the second.
If the budget allows one addition, make it under-cabinet light: front of the cabinet, own switch, diffused, driver you can reach. Decide the rest early, because a lighting plan is not a shopping list. It is a wiring plan, and a wiring plan gets built while the studs are showing. If you want someone to walk your kitchen and mark where the light has to come from, ask for an estimate and we will do that with you.
