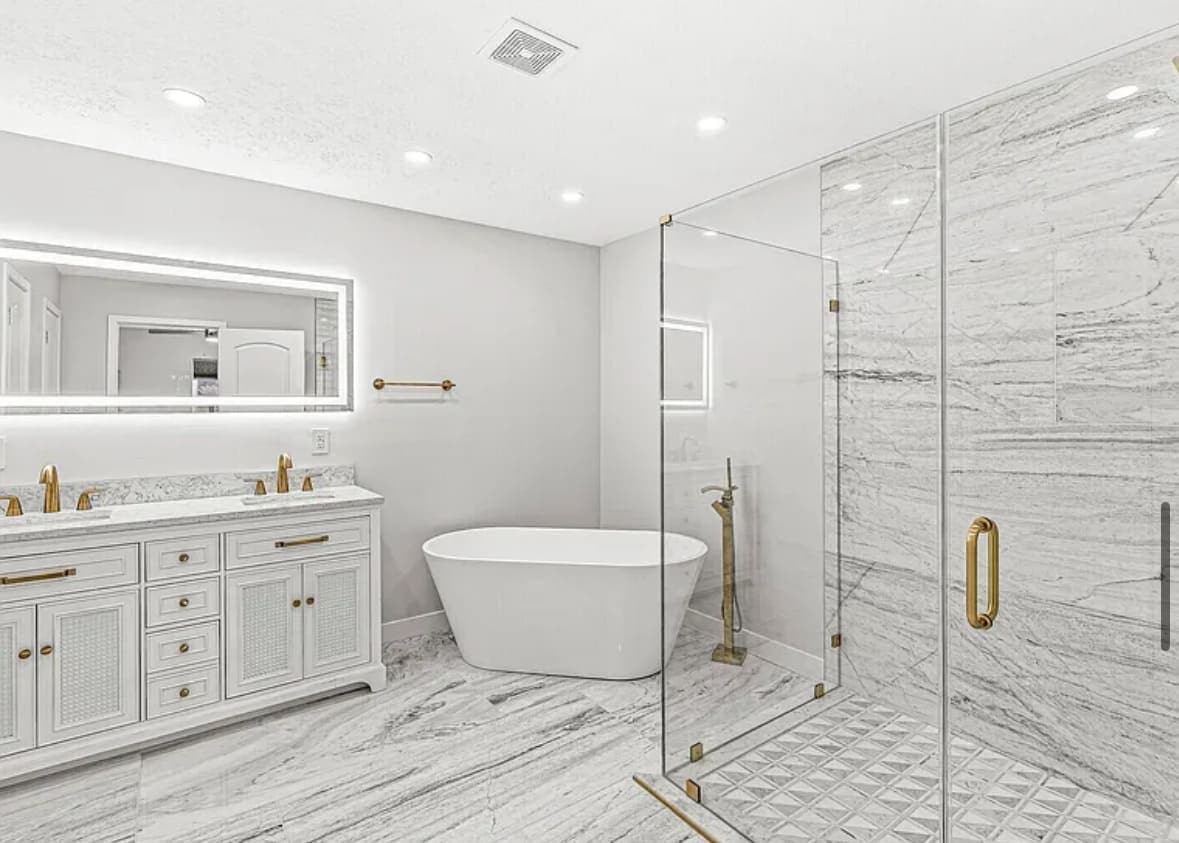
Paint is the last thing that goes on a bathroom and the first thing that fails, and it almost never fails in the middle of a wall. It fails at the ceiling over the shower. A chalky patch first, then a blister, then a sheet that lifts at a taped seam and comes away with drywall paper still stuck to the back of it.
Most people read that as bad paint and buy a better can. The paint is rarely the problem. Sheen is a real decision and we will get to it, because it is the question everyone actually asks — but it is the third decision in a row of three, and the two ahead of it decide whether the third one gets to matter.
What sheen actually is
Every can is pigment, binder and the liquid carrying them. Sheen is the ratio between the first two. More binder and less pigment gives a dried film that is tighter and more continuous, so it throws light back at you instead of scattering it. More pigment and less binder gives an open, porous film that hides whatever it sits on.
That one trade-off drives all of it. As sheen climbs:
- the film passes less water and less vapor,
- it takes being wiped without burnishing,
- and it reports every flaw in the surface underneath.
Flat hides a bad wall and drinks moisture. Gloss sheds moisture and tells on the drywall. The whole choice is deciding where on that line each surface belongs.
One caution first: the names are not standardized. One manufacturer's eggshell carries more shine than another's satin, and "matte" now covers a wide spread. The data sheet lists a measured sheen value. The word on the front of the can is marketing.
The short answer, surface by surface
Walls. Satin, or a good eggshell. That is the working default for a family bathroom. It wipes, it resists condensation sitting on it, and it does not turn the room into a corridor. The old rule of semi-gloss on every bathroom wall came from an era when lower sheens had no washability at all. It is out of date, and semi-gloss on a large wall under vanity lighting looks like a school.
Ceilings. Not standard flat ceiling white, whatever the tin says about ceilings. The ceiling over a shower is the wettest painted surface in the house and flat is the most porous film you can put on it. Use a bathroom-rated ceiling product or an eggshell. You trade a little flaw-hiding for a film that sheds condensation, and in that room it is the right trade.
Trim, doors and jambs. Semi-gloss, or a waterborne alkyd enamel. These take splash and hands, and the top edge of a baseboard beside a tub is a shelf that holds drips. A harder film also gives block resistance — the reason a door in a humid August does not stick to its own jamb and pull its paint off.
Powder rooms. The one place a washable matte earns its keep — no shower, no vapor load.
Inside a shower. Nothing. Paint is not a wet-area material and no sheen makes it one.
The ceiling is the surface that fails
A hot shower fills the room with moisture and that air goes up. In heating season the ceiling is the cold plane, because on the other side of that sheet of drywall is a vented attic. Warm wet air meets a cold surface and hands the water over on the room side, exactly where your paint is. Every shower, all winter, and a porous film gives up.
Three things make it worse, and none of them is the paint.
The first is where the fan duct ends. A fan terminating in the attic rather than through the roof or a gable wall does not remove moisture from the house — it moves it to the cold cavity directly above the room, where it condenses and finds its way back. That is a longer subject, and we wrote it out in the fan matters more than the tile, because a repaint over a ventilation problem is a repaint you do again.
The second is insulation depth over that particular ceiling. Bathrooms sit at the end of a hall, often under the low corner of a hip roof, and the insulation gets thin exactly where nobody can crawl. Cold spot, condensation, blister.
The third is penetrations. A fan housing, the recessed cans and a supply grille are all holes cut in the air barrier of a wet room, and sealing them while the ceiling is open costs almost nothing compared with reaching them later.
How much sheen the wall underneath can carry
Sheen is not a free choice. It is limited by the finish level of the drywall, and bathroom lighting is unusually cruel about it. Sconces and mirror lights sit close to the wall and throw light along it rather than at it, which is the condition that makes every ridge of tape stand up. That raking effect is why the three layers of bathroom light belong in the same conversation as the finish, not a separate one.
A builder-standard drywall finish sits happily under flat paint. Take the same wall to satin and you start seeing nail dimples, the shoulders of joint compound at each seam, and the sanding halo around a patch. Getting a higher sheen to look right means a higher finish level — more compound, wider feathering, sometimes a skim coat over the whole plane. That is labor, priced as labor.
Patches behave differently again. Bare compound and sealed paint absorb at different rates, so a spot-primed repair reads as a change of sheen under side light even when the color matches. That is flashing, and there is one fix: prime the whole plane, then paint it corner to corner.
Primer is the decision, paint is the consequence
Primer is the coat that decides whether the finish coats stay attached. It is also invisible, which is why it is the first thing dropped when a painting line needs to come down.
New board, and board that has been patched
Fresh paper-faced gypsum and cured joint compound have very different porosity. A drywall primer-sealer evens that out so the topcoat lays down at one film thickness. Skip it and the first coat sinks into the compound and sits on the paper, which you read as patchy sheen the first morning light comes in sideways. Moisture-resistant board still needs sealing too. It resists moisture better than standard board. It is not a finished surface.
Old gloss, old oil
Anything glossy, and any older trim likely to be alkyd, needs scuff sanding and a bonding primer before a waterborne coat goes near it. Without that the new paint sits on the old film instead of gripping it, and it peels in sheets the first time a fingernail catches an edge. In a lot of the older Hamilton County houses we open up the bathroom trim has been oil at some point in its life, and you find that out by testing it, not by assuming.
Stains, and the thing you must never paint over
A water stain bleeds through latex — not through one coat and then stops, but through as many as you care to apply, because the water in the paint keeps remobilizing it. It takes a stain-blocking primer, shellac-based or purpose-made, before the color.
Mildew is more serious. A mildewcide in a dry paint film resists new growth. It does not treat what is already there. Painting over live mildew buries a food source under a fresh film and it comes back through, often within the season. It has to be cleaned off and killed first.
Here is the honest part. If black spotting keeps returning at the same ceiling corner after a proper clean and repaint, the answer is not a better paint. It is ventilation, insulation, or water arriving from somewhere it should not be — and we would rather say that than sell a coat that hides it and call the problem solved.
The conditions on the day
Paint has a temperature and humidity window on the data sheet, and a bathroom is the easiest room in the house to fall outside it. A humid Indiana August with the air conditioning off stretches open time and slows the cure. Heating season, with dry air moving, shortens both. Either is workable if the recoat window is respected.
Dry and cured are also two different things. A film dry to the touch has not reached its final hardness, and that gap is where surfactant leaching comes from — clear or brownish glossy drips appearing on a fresh wall after somebody showers in the room too soon. It washes off, and it is still a warning that the film was asked to work before it was ready. The seasonal swing behind all of this is the same one that moves wood and cabinet doors here.
Where caulk stops and paint starts
This is the boundary that gets the most bathrooms wrong, and it is a sequencing question rather than a product question. Two kinds of joint, two materials, two different points in the schedule:
- Trim-to-wall, casing-to-jamb, the top of a baseboard. Painted joints. They get a paintable acrylic-latex sealant, tooled before the finish coats, so the paint bridges across and the line reads as one surface.
- Tub-to-tile, tile-to-floor, countertop-to-backsplash, the base of a vanity. Wet, moving joints between two hard materials. They get pure silicone — not a siliconized acrylic — and it goes on after the painting is finished.
The failure we find most often is one crew doing both with the same tube. Acrylic caulk in a tub-to-wall joint looks tidy on handover day because it takes paint. It has very little movement capability in a joint that opens every time a tub fills, so it splits — and a parted caulk line is a funnel pointed at your framing.
The reverse mistake is painting over silicone. Silicone takes no coating at all. The paint beads, then flakes, in the most looked-at line in the room. If silicone has been run where paint has to go, it comes out first, mechanically, back to clean substrate.
Depth matters as much as material — sealant should bond to two faces and be free of the third, which is what backer rod is for. We went through the whole set of joints, and which ones move, in grout, caulk, and the joints that fail first.
What paint cannot do
Paint is a finish, not a barrier, and the closer a coating gets to gloss the more tempting it is to think otherwise. A tight film slows vapor at the surface. It does not stop water reaching the substrate through a failed joint or a leaking valve, and it cannot dry a wall out from the room side. Inside a shower the assembly under the tile does that work, which is why what goes behind the tile is a different order of decision from what color the walls are.
One more trap. Stacking low-permeability layers on both sides of an assembly leaves moisture nowhere to dry to. On an exterior bathroom wall, a heavy coating on the room side is not automatically an improvement.
What this is worth in the budget
Paint is among the cheapest materials in a bathroom and among the most visible results, and nearly all the money in it is preparation — sanding, patching, priming, masking, the hours nobody photographs. We do not publish our own prices: a number written before anyone has seen your bathroom is a guess. What we can point at is independent research. Angi's Indianapolis bathroom cost research and published Greater Indianapolis contractor cost guides put a typical bathroom around $10,000, with most falling roughly between $5,700 and $14,700.
Against a figure like that, the difference between a two-coat repaint and a properly primed, correctly sheened, correctly caulked finish is small. The difference in how the room looks a few years on is not.
The short version
Get the order right and the sheen question answers itself.
- Fix the moisture first — the fan, the duct termination, the insulation above the ceiling.
- Prime the whole plane, never the patch.
- Satin or eggshell on walls, a bathroom-rated product on the ceiling, semi-gloss or an enamel on trim, nothing inside the shower.
- Acrylic caulk before paint on painted joints. Silicone after paint on wet ones. Never the other way round.
On our own jobs the painting sits at the end of the finish stage described on the bathroom remodeling page, after the waterproofing and the tile, silicone joints last of all. That order is why the ceilings and trim in the rooms we have finished still read as one surface rather than a patchwork. The sequence is what decides whether a paint job is still doing its job long after handover.
If your ceiling is already peeling and you want to know whether it is a paint problem or something behind it, ask for an estimate and we will come and look.
