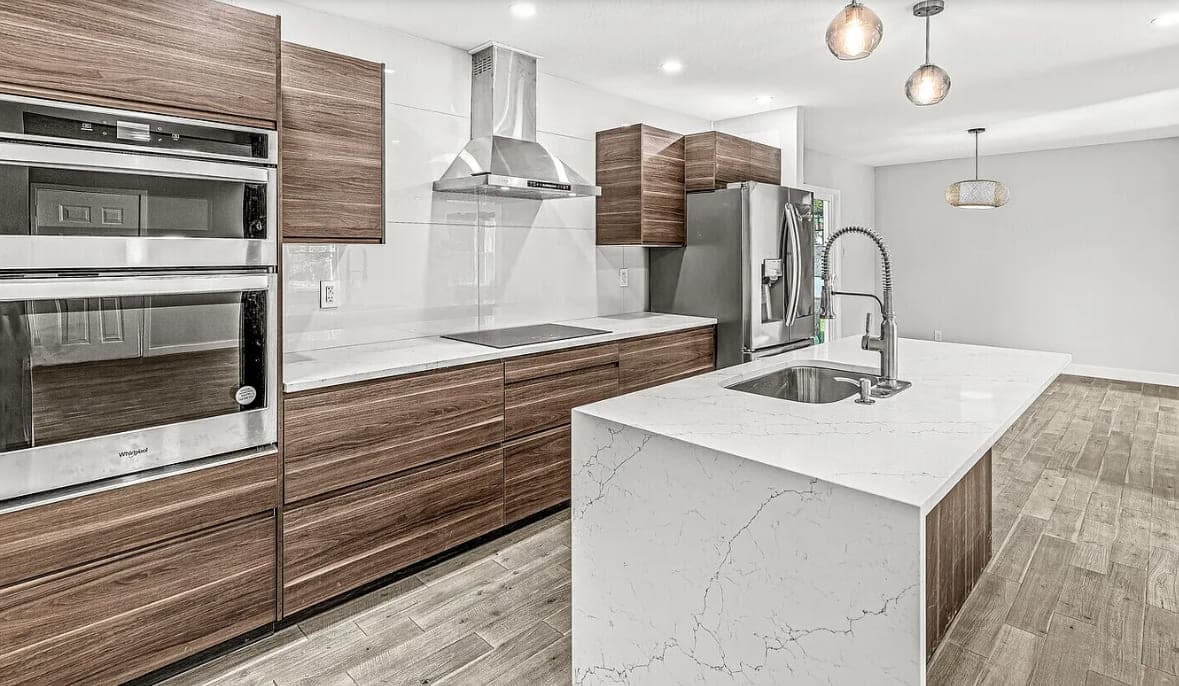
Stand beside a pan that is genuinely searing and watch what comes off it. The plume leaves narrow, widens as it climbs, and drags room air along with it. By the time it reaches the height a hood hangs at, it is broader than the pan that made it and leaning toward whatever else moves air in the room — a supply register, a ceiling fan, the back door somebody just opened. A blower removes what is inside the hood. Everything that arrives outside the perimeter is in your kitchen, and it stays there.
So the airflow rating is the last thing to settle. It is on the front of the box because it is the easy number to print. What decides whether a hood works is how much of the cooking surface it covers, how far forward it comes, and how low it hangs.
Steam clears, grease lands
Two different things leave a pan and they behave nothing alike. Steam is visible, it announces itself, and a room that misses some of it recovers. Grease is aerosolized, invisible, and it does not clear — it lands. On the cabinet door faces either side of the range. On the underside of the crown. On the ceiling, in a slow oval you notice the day you repaint.
What you cook on changes the shape of the problem. A gas burner throws a hot, buoyant plume that climbs fast, and it carries combustion products with it — the argument for sending it outside rather than filtering it and handing it back. Induction and electric make a cooler, wetter plume with less lift. It rises lazily and spreads wider on the way, so capture area matters more under induction, not less.
Before shopping, read the hood you have. Put a kettle on a front burner and watch the edge of the plume against the front lip. Then run a finger along the top rail of the cabinet door nearest the range. Film on the door says the same thing the kettle does.
Capture area: width before anything else
On a wall
Matching the width of the cooking surface is the floor, not the target. A hood narrower than the range is the most common sizing mistake we find, and it is nearly always a cabinet elevation drawn first with the hood dropped into what was left over.
Going wider is the cheapest improvement in the whole ventilation decision — no more airflow, no more noise, no more duct. Pans overhang the front and sides of the grate. The plume leans. A wider hood keeps that inside the capture area instead of a hand's width outside it.
What pushes back is the cabinet run: wider hood, narrower uppers either side, and on a tight wall that is the difference between a usable cabinet and a filler panel. It is a drawing decision, which is why it belongs in the cabinet shop drawings rather than on site. Moving a hood later moves stiles, blocking and the tile layout with it.
A tiled or plaster surround is carpentry wrapped around a liner, and the liner is what captures — a modest one inside a broad surround is a decorative box with a small hood in it. It also sets where the backsplash stops.
Over an island
An island changes the arithmetic. Against a wall, the wall does half the containment — there is one direction the plume cannot go. Over an island air moves on all four sides, so the hood has to be wider than its wall-mounted equivalent to do the same work. It also hangs at eye level in the sightline from the next room, which is why people shrink it.
A wider hood wants a wider island, and the island is already squeezed from both sides. NKBA guidance is a clear work aisle of 42 inches for one cook and 48 inches where two people work in the same aisle or somebody passes behind a person working — design guidance rather than Indiana code, and measured with the doors open. Those numbers cap the island before they cap the hood, so it belongs in the island conversation at the start of it.
Depth, and the burners you actually use
Most cooking happens at the front burners. Most hoods are shallower than the cooktop is deep. Put those two facts together and you have the source of most hood disappointment: when the leading edge stops behind the front burners, the plume off the burners you use every night rises in front of the hood instead of under it.
Three ways out. A deeper hood. A lower mounting height, which pulls the capture area forward as well as down. Or a hood shaped to lean out over the range.
Depth has a limit and the limit is your forehead. A hood deep enough to cover the front burners and low enough to catch them is one you will meet while stirring. Somebody who sears and reduces should take that hit. Somebody who mostly reheats should not, and should not pay for the hood either.
Mounting height is a window in the manual
Every hood ships with a minimum and a maximum height above the cooking surface, printed in the installation instructions. That window is not a styling range. The bottom of it is clearance to combustibles and a fire limit, tighter over gas. The top is where the manufacturer stops claiming the thing performs.
Inside the window, low captures more with less airflow, at the cost of knocks and heat on the underside. High needs more airflow to catch less, because the plume has spread wider than the hood by the time it arrives. High photographs better, which is why we see it so often. A tall ceiling usually needs a chimney extension, a separate part number ordered with the hood — finding that out on install day stops the install.
The over-the-range microwave
An over-the-range microwave is a storage decision sold as a ventilation one. The blower is small, the capture area is shallow, and it hangs at the height a microwave has to be usable at rather than the height a hood wants. Plenty are set to recirculate at the factory and stay that way. In a house where nobody sears anything that is a fair trade — it saves a cabinet and it saves money. If somebody cooks seriously, it is the wrong appliance.
Then the airflow, and the duct that decides whether you get it
Once the geometry is settled, the rating starts to matter. More cooking surface, more burners and higher output all ask for more, and a professional-style range asks for far more than a standard one — one of the ways panel-ready and built-in appliances change the room around them.
That rating was measured on a bench with almost nothing attached to the hood. Real duct fights back, and every foot of pipe, every elbow, the damper and the exterior cap take a bite out of it. Same arithmetic as sizing a bathroom fan, with one difference that changes what counts as acceptable: this duct carries grease.
Which sets the rules. Rigid, smooth-walled metal, in the diameter the manual asks for, sealed at the joints, run as short and straight as the framing allows. Flex duct in a hood run is a ribbed surface built to hold exactly what you are trying to remove. Necking the collar down to reuse what is already in the ceiling throttles the blower at its own outlet.
It ends outside, at a cap with a damper that closes — not in the attic, not into a soffit, not in a wall cavity. Getting there is not free either. Joists cannot be cut wherever it suits, so the run follows a joist bay, goes out the roof, or gets a soffit built to carry it. Which one applies is among the larger things moving a range drags along.
Make-up air, and the rest of the house
Every cubic foot the hood throws outside comes back in somewhere. Past a certain exhaust rate the mechanical code requires that somewhere to be deliberate: powered make-up air, ducted and interlocked with the hood. We are not publishing the threshold, because the figure that applies to your house comes from the code your jurisdiction has adopted. Ask early — it is a duct, a damper and a control, not a fitting bought at the end.
Without it, a large hood in an Indiana January pulls replacement air through whatever leaks. Under an exterior door. Down the basement stairs. Down the flue of an atmospherically vented water heater, which is a combustion safety problem rather than a comfort one. A new duct through an exterior wall or a roof is mechanical work, and Fishers puts the permit trigger on structural, electrical, plumbing or HVAC change. Carmel, Noblesville and Westfield each have their own authority, so confirm it locally.
When ducting is genuinely not on the table
A recirculating hood pulls air through a grease filter, pushes it through charcoal for odor, and hands the heat and the moisture back to the room. It removes nothing from the house. Where the only route out means opening a ceiling across half the floor, that is a fair compromise and we will build it. In a kitchen that could have been ducted, it is the decision you regret in August. Downdraft asks a rising plume to travel down and eats the cabinet under the cooktop for a blower housing — we argue against it before it reaches a drawing.
Noise, filters, and whether you will run it
A hood nobody switches on captures nothing, which puts it level with a hood that is too narrow. Where the blower sits matters as much as the rating: in the canopy is loudest, inline in the duct run is quieter, remote at the termination puts the motor outside the house.
Filters are the maintenance that falls to you. Baffle filters shed grease into a trough and go in the dishwasher. Mesh filters load up and choke the airflow, quietly undoing the sizing you paid for.
Where it lands in a quote
We do not publish our own prices, for the reason we give everywhere else: a number written before anyone has seen your kitchen is a guess. What we can point at is what independent research says people spend in this market. Angi, Homeyou and Block Renovation's Indianapolis kitchen research puts a kitchen project here at roughly $18,000 to $24,000, with the full spread running about $8,000 to $40,000.
Against a number like that the hood is a small line. The duct is mostly labor, framing and a hole through the outside of the house, and it is the part that goes missing. A hood line with no duct, no termination and no damper beside it means somebody plans to reuse whatever is up there — the sort of gap worth chasing while reading an estimate line by line.
The short version
Size a hood in this order, and the order is the point.
- Cover the cooking surface, then go wider if the cabinet run or the island allows it.
- Get the depth out over the front burners, or decide plainly that they are not covered.
- Hang it inside the manual's window, at the low end you can live with.
- Pick the airflow for the range you actually bought.
- Duct it in rigid metal at the size the manual asks for, and end it outside at a real cap.
The airflow rating is the only one of those you can change later without opening something up. The rest is cabinet widths, blocking and a duct route, all built long before an appliance is delivered.
Which is why a hood belongs with the layout rather than the appliance order, and why it comes up early on a kitchen remodel. If you want somebody to look at what your ceiling and your exterior wall will allow, ask for an estimate and we will come and measure it.
