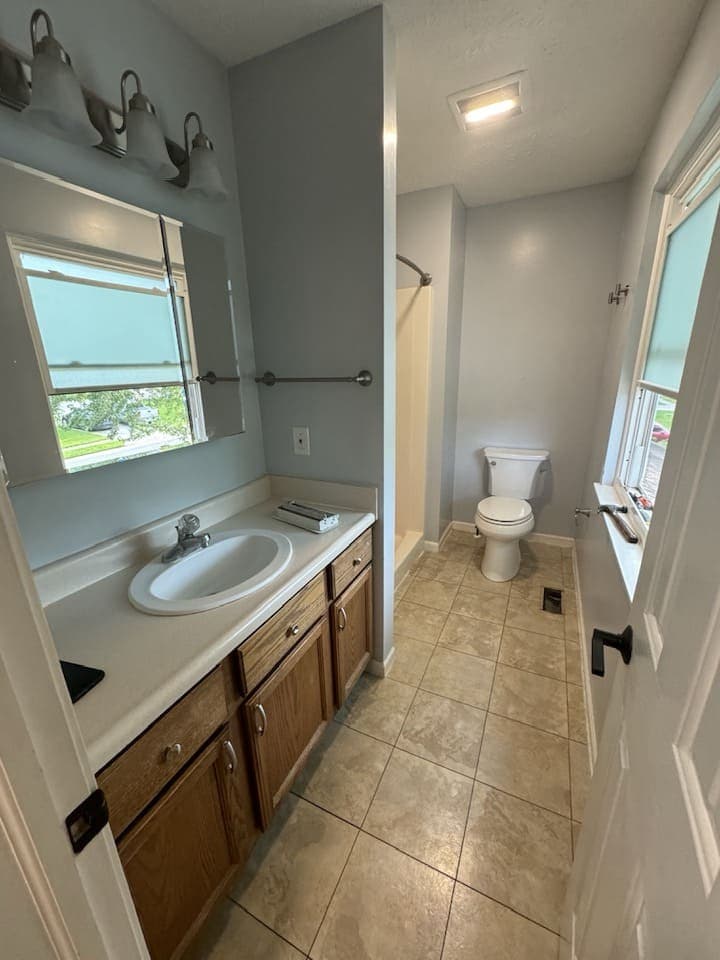
A toilet is the cheapest fixture in the room and the one most likely to arrive and not fit. It gets chosen late, usually from a photograph, often by the homeowner while the tile is still going up. Then the box comes open and the tank is pressing against the wall, or standing off it with a gap behind that will collect dust for as long as you own the house.
One measurement decides that. It takes a tape and a minute, and it is the one nobody takes before ordering.
Rough-in is measured from the finished wall
The rough-in is the distance from the finished wall behind the toilet to the center of the drain. Not from the baseboard. Not from the framing. From the face of whatever will be there when the room is done.
With the old toilet in place, measure off the bolt caps at the base: wall to the center of the bolts. If there are two pairs, use the back pair — the front pair gives you a number nothing is built to. With the toilet pulled, measure to the center of the flange opening, the hole itself rather than the outer edge of the ring.
Then check what you measured from. A baseboard sits proud of the wall, so a tape that started there gives you a rough-in short by its thickness. Measure above it, or add that thickness back. That mistake returns more toilets than any other.
Toilets are not sold across a continuous range of rough-ins. There is a small set of standard dimensions, and every bowl is built for one of them. The common one covers most houses put up in the last several decades, and most of what a showroom stocks is made to it. The others turn up in older houses, and in powder rooms where the drain was set tight to the wall to buy floor space, and a bowl made for the common dimension will not sit down on any of them. A few models are offered in more than one version; most are not. The dimension is printed on the spec sheet, which is a different document from the product page, and a listing that never names one is a listing you cannot order from safely.
The wall and floor you have not built yet
If you are measuring mid-remodel, you are measuring to a wall that is about to move. Tile on the wall behind the toilet, and the backer under it, push the finished face into the room and shorten the effective rough-in by the thickness of the whole assembly. In a powder room with a tiled feature wall, that is enough to turn a comfortable fit into a tank that will not clear.
The floor moves too. New tile over a leveling compound raises the finished floor, and the closet flange has to end up at or just above that surface. A flange left at the old height means the bowl sits on a stack of extender rings, or on a wax ring squeezed to fill a gap it was never meant to bridge. That is the usual cause of a toilet that starts rocking later and a subfloor that goes soft around it. Build the floor up and the flange gets reset — into something flat, which is why the subfloor gets leveled first.
Offset flanges, and when we use one
An offset flange moves the bowl a short distance from where the drain actually is. It is a real fitting, and there are rooms where it saves opening a floor. It also narrows the flow at the one place you least want narrowed. We use one when the alternative is cutting a joist bay for a fixture that does not need to move. We do not use one to rescue a rough-in that a tape measure would have caught.
Moving the drain properly costs more, because a toilet drain is the fattest pipe in the room and has to fall continuously toward the stack. It is why a small bathroom layout is cheaper when the toilet stays put.
The clearances on either side and in front
Rough-in gets the toilet onto the drain. Clearance decides whether the room is usable.
Code sets a minimum from the centerline of the bowl to any sidewall, vanity or tub, and a minimum clear space in front. Your building department enforces those and is the authority on them — not a catalog, not a blog. A minimum is a floor, not a target. A bowl squeezed to the limit beside a vanity means your elbow finds the drawer pull every time.
Three things get missed here more than any others:
- The door swing. A door that clears the bowl but stops against the tank is a door you will fight forever.
- The paper holder. It has to land where a seated hand reaches it, which is a blocking decision made while the wall is open.
- A skirted bowl's footprint. Wider and squarer than the molded base it replaces, and it eats side clearance the drawing gave to the vanity.
Height, and who actually uses the room
Bowls come in a standard height and a taller one, usually sold as comfort or chair height. The taller bowl is closer to sitting down in a dining chair, and it is easier to get up from — which matters to most adults eventually and to some people now.
It is not automatically right. A taller bowl leaves shorter adults and young children with their feet off the floor, which is worse than uncomfortable for a child being potty trained. Seat thickness adds to it again.
Sit on both in a showroom, then decide per room rather than per house. The primary and the kids' bath do not have to match, which is the same logic behind spending differently on a guest bath than on a primary. If anyone in the house is heading toward a grab bar, put solid blocking in the wall beside the toilet while it is open. Blocking is cheap now and a wall repair later.
One piece, two piece, skirted, wall-hung
A two-piece is the common one. The tank bolts to the bowl over a gasket, which is a serviceable part, and the two boxes carry up a staircase one at a time. The seam between them is a crevice that never comes properly clean.
A one-piece has no seam. It wipes down in one pass, it is heavier than it looks and it is usually more money. If the china cracks, the whole fixture goes rather than half of it.
A skirted bowl hides the trapway behind a smooth outer wall, which removes the worst cleaning job in the bathroom. The trade is tolerance. Most skirted models mount to a bracket fastened to the floor, and are far less forgiving of a drain that is off center or a rough-in that is short. If you want one, take the measurement seriously.
A wall-hung toilet puts the tank inside the wall on a steel carrier frame and leaves the bowl floating over the tile. Nothing is easier to mop around. It needs a wall deep enough to swallow the carrier, and the flush plate has to stay accessible for service. All of that is decided before drywall, alongside the rest of the work nobody ever sees. Choosing one after the walls are closed means opening them again.
How it flushes
Most toilets flush by gravity: the weight of the water in the tank, the size of the flush valve letting it go, and the geometry of the trapway. Quiet, simple, nothing to service but a flapper or a canister seal.
Pressure-assisted models hold a sealed vessel in the tank that uses your supply pressure to push the flush. They clear a bowl hard and clog less. They are also loud in a way that carries through a wall, so we would think twice about one backing onto a bedroom, and the parts are less likely to be on a local shelf.
Beyond that, the details worth reading on a spec sheet are the ones that do not photograph:
- Trapway size, and whether it is glazed. A glazed trapway is a slicker path for solids to travel.
- Flush valve and rim wash. A larger valve dumps water faster, and a rim that washes the whole bowl beats one dribbling from a few holes.
- MaP results. Independent flush-performance testing is published for most models, and it separates two toilets that look identical.
Dual-flush is fine, with one caveat: its seal is bigger and it is the part most likely to weep, and a weeping seal refills the tank all night.
In a basement the flush is not the question. Whether the drain sits below the sewer line is, and that decides between a standard toilet, an up-flush unit and a pit with an ejector pump — the first thing we settle in a basement bathroom rough-in, before anyone picks a fixture.
The parts nobody looks at
The seat is not always included. Check.
Then the supply stop: the small valve at the wall. Old multi-turn stops seize, and you find out at the moment you need one. We fit a quarter-turn stop, because the next person reaching for that valve will be standing in water.
The seal under the bowl is a wax ring or a waxless gasket. Wax works, it is cheap, and it gets one attempt — set the bowl down crooked, lift it, and the ring is finished. A waxless seal can be reseated, which matters when the flange is a hair low.
Then the bolts. A toilet that rocks is a broken seal in slow motion, and the fix is shims under the base, not more torque. Over-tightening cracks china, always after the plumber has gone.
Last, the base joint. We caulk around the foot of the bowl and deliberately leave the back open. If the seal ever fails, that gap lets the water show on the floor where you can see it, instead of feeding it into the subfloor. It is the same reasoning behind every other joint we choose to leave flexible.
A bidet seat needs power at the toilet: a protected receptacle within reach, roughed in before the wall closes, which puts it inside where a bathroom outlet is allowed to go.
What we find in older houses
Around Fishers, Carmel and Noblesville we open floors up to a cast iron closet bend, a flange rusted thin at the ears, a subfloor darkened in a ring around it, and a rough-in that matches no standard dimension at all, because the pipe was set by hand. None of it shows with a toilet on top, which is the general rule in older Hamilton County houses: the fixture is fine, the thing under the fixture is the job. Nothing in a photograph of a finished bathroom tells you whether that part was dealt with.
Swapping a toilet in place is a different animal from relocating one. The moment a drain moves it is a plumbing change, and that is the trigger for a permit here. Expect anyone quoting the work to say the same.
Before you order
Do these in this order, before you buy anything:
- Measure from the finished wall to the center of the closet bolts, back pair.
- Account for any tile or backer going onto that wall.
- Photograph the flange and note where it sits against the finished floor.
- Check side clearance, front clearance and the door swing.
- Sit on both bowl heights before you decide which room gets which.
- Read the spec sheet, not the product page, for the rough-in and the mounting kit.
On our jobs the rough-in gets confirmed at the walkthrough, and the flange gets set to the finished floor we are building rather than the one there now — the same sequencing the rest of a bathroom remodel runs on. If you would rather someone measured it with you before you buy anything, ask for an estimate and we will bring the tape.
